To upload to an S3 bucket, you just need to follow these steps:
- Install the AWS S3 SDK to generate a presigned URL.
- Generate the presigned URL using the SDK, which includes the following commands:
- The
put_objectcommand for uploading - The
get_objectcommand for accessing the content
- The
- Use the appropriate command and upload or access the content
Steps:
- Generate
access keyandsecret access keyon aws - Install the library for your programming language. (I will be using python)
pip install boto3
- Initialize the S3 SDK for python
import boto3
from botocore.client import Config
from boto3_type_annotations.s3 import Client

def initialize_s3_client() -> Client:
    s3_client: Client = boto3.client(
        "s3",
        aws_access_key_id=AWS_ACCESS_KEY_ID,
        aws_secret_access_key=AWS_SECRET_ACCESS_KEY,
        region_name=AWS_REGION,
        # Using v4 for signature
        config=Config(signature_version='s3v4')
    )
    return s3_client
- Generate the presigned URL in order to upload the file
import boto3
from boto3_type_annotations.s3 import Client
from botocore.exceptions import NoCredentialsError, PartialCredentialsError

def generate_presigned_url_for_upload(
        s3_client: Client,
        bucket_name: str,
        object_name: str,
        expiration: int = 3600,
    ) -> str | None:
        try:
            # Generate a presigned URL for the S3 object to upload file
            response = s3_client.generate_presigned_url(
                "put_object",
                Params={
                    "Bucket": bucket_name,
                    "Key": object_name,
                },
                # Expire time of presigned URL in second
                ExpiresIn=expiration,
            )
        except (NoCredentialsError, PartialCredentialsError) as e:
            print("Credentials not available", e)
            return None

        return response
- Generate the presigned URL in order to access the file
import boto3
from boto3_type_annotations.s3 import Client
from botocore.exceptions import NoCredentialsError, PartialCredentialsError

def get_presigned_url(
    s3_client: Client,
    bucket_name: str,
    object_name: str,
    expiration: int = 3600,
) -> str | None:
    try:
        # Generate a presigned URL for accessing the file from bucket
        response = s3_client.generate_presigned_url(
            "get_object",
            Params={
                "Bucket": bucket_name,
                "Key": object_name,
            },
            # Expire time of presigned URL in second
            ExpiresIn=expiration,
        )
    except (NoCredentialsError, PartialCredentialsError) as e:
        print("Credentials not available", e)
        return None
    return response
- Using the presigned url now you can upload or access the file
Note: I have already created a fastapi endpoint to generate presigned url or You can directly execute the python file.
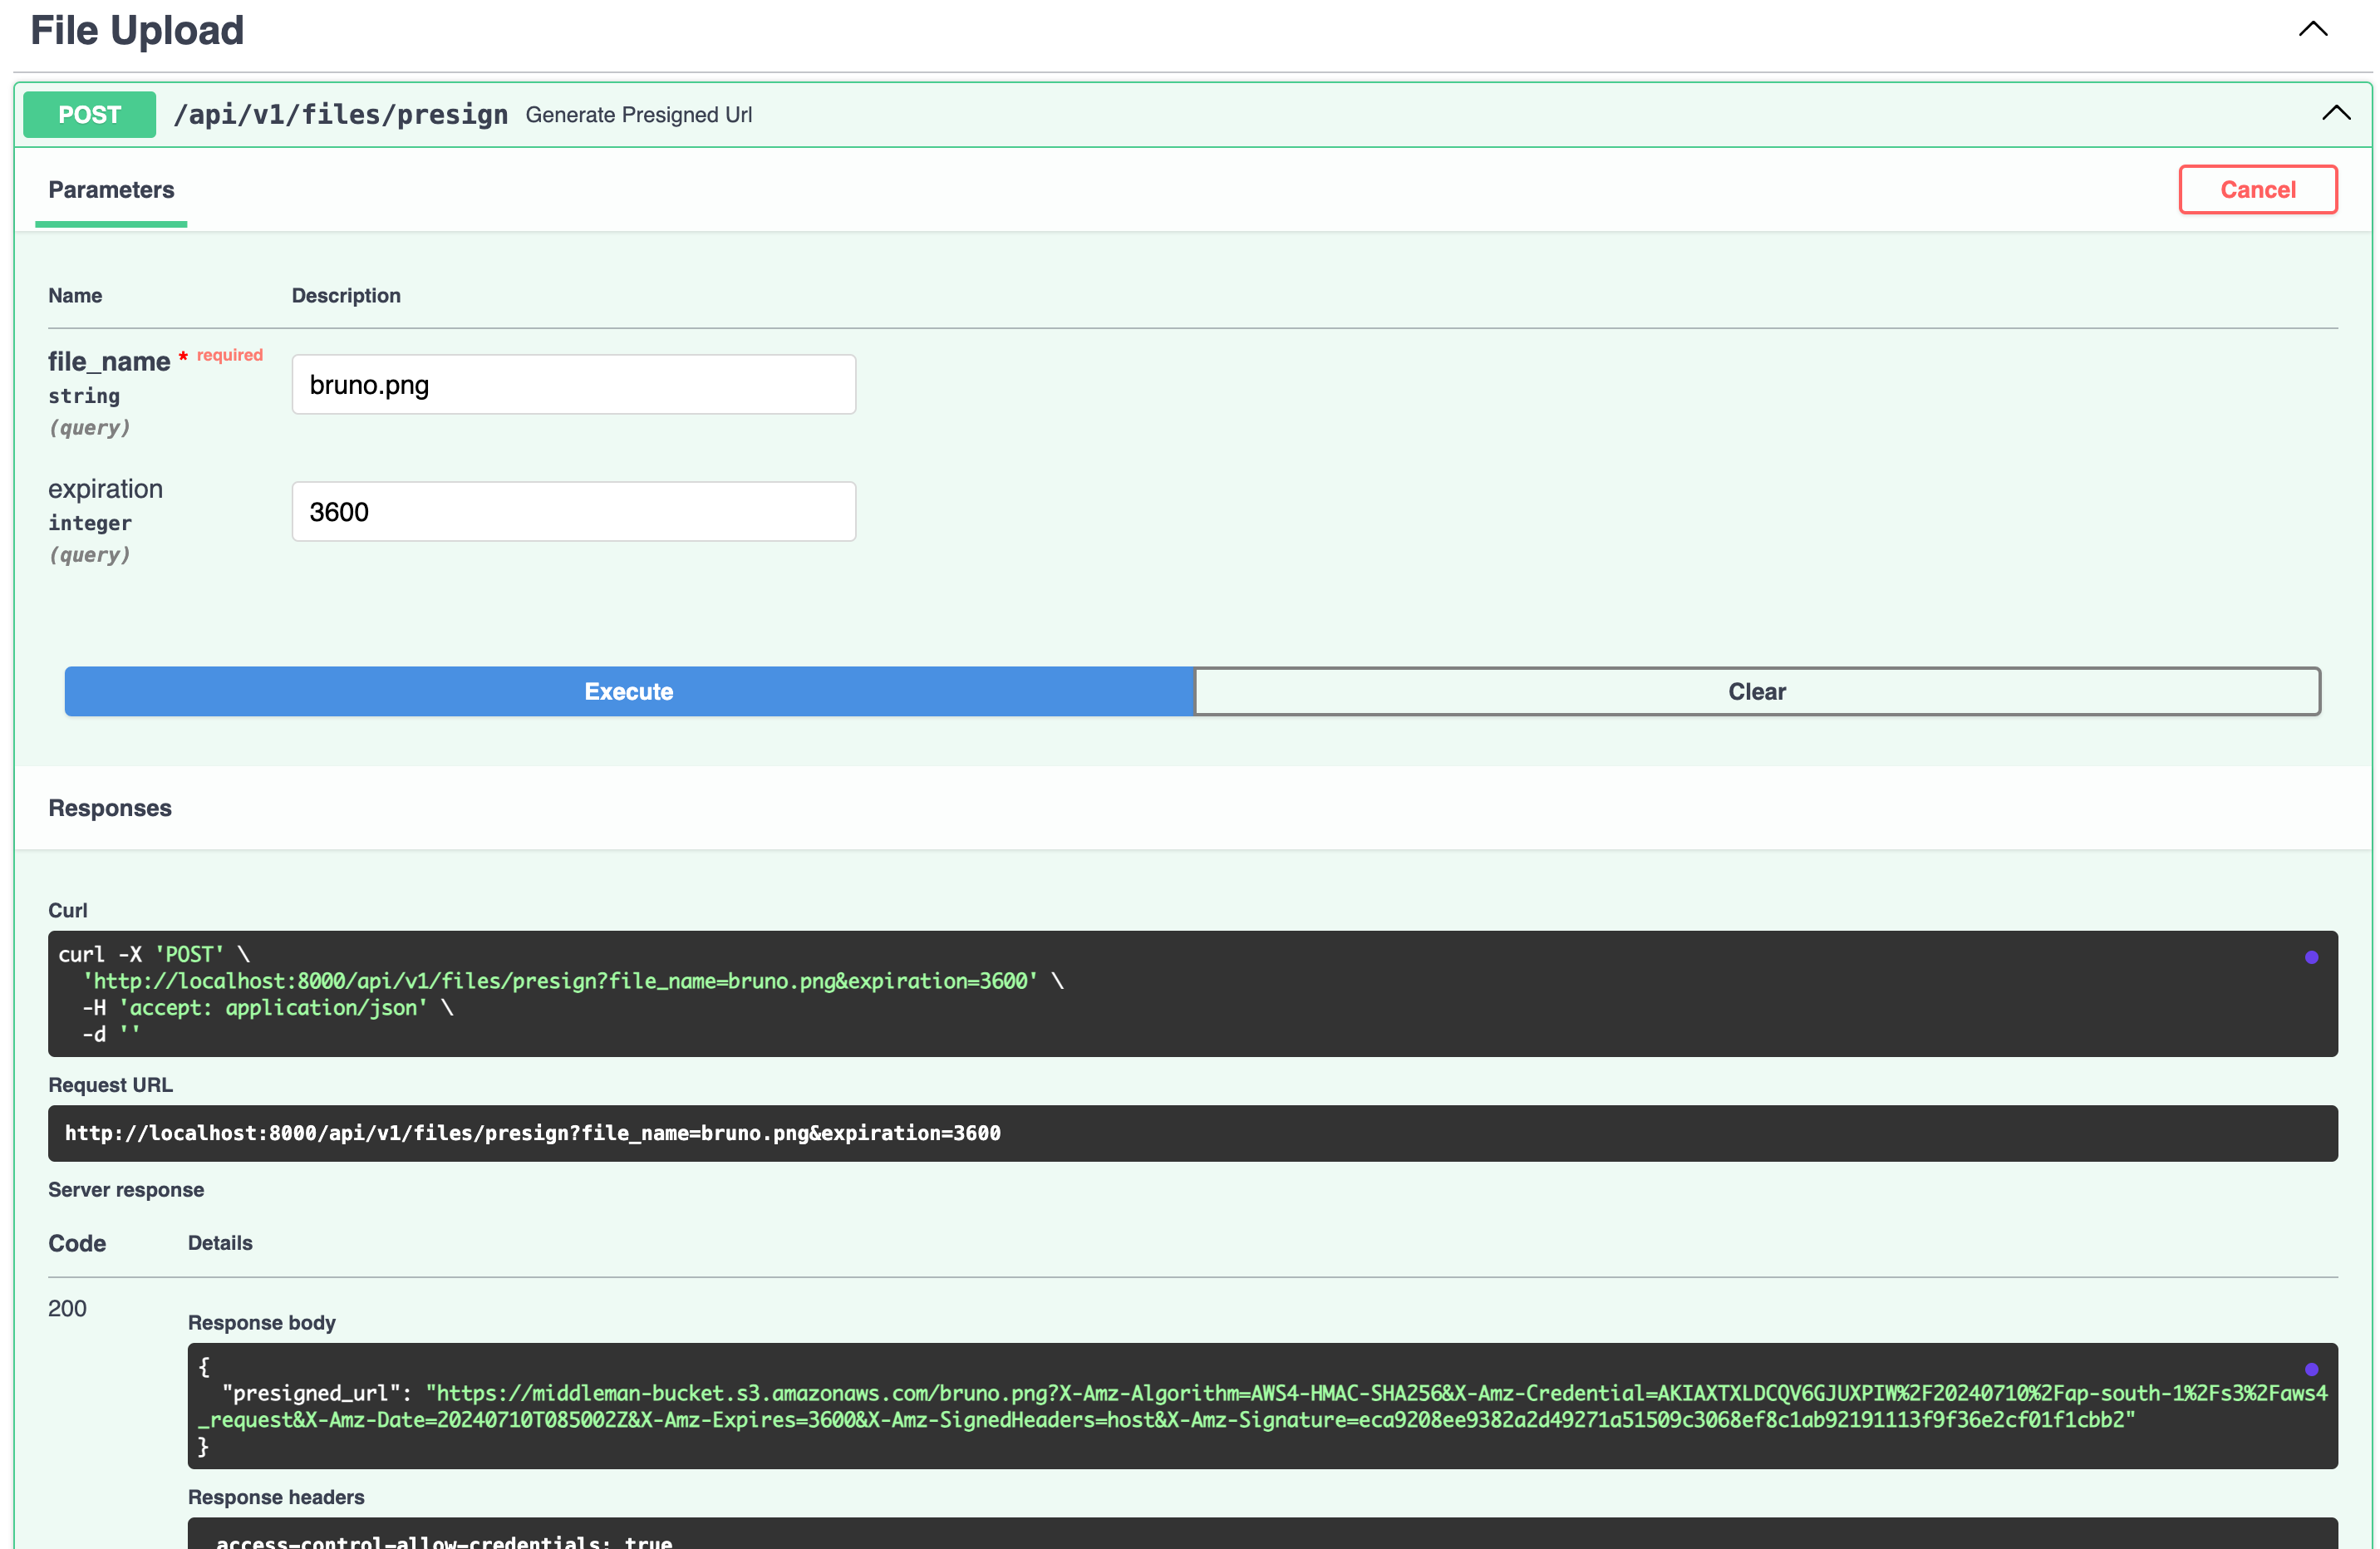
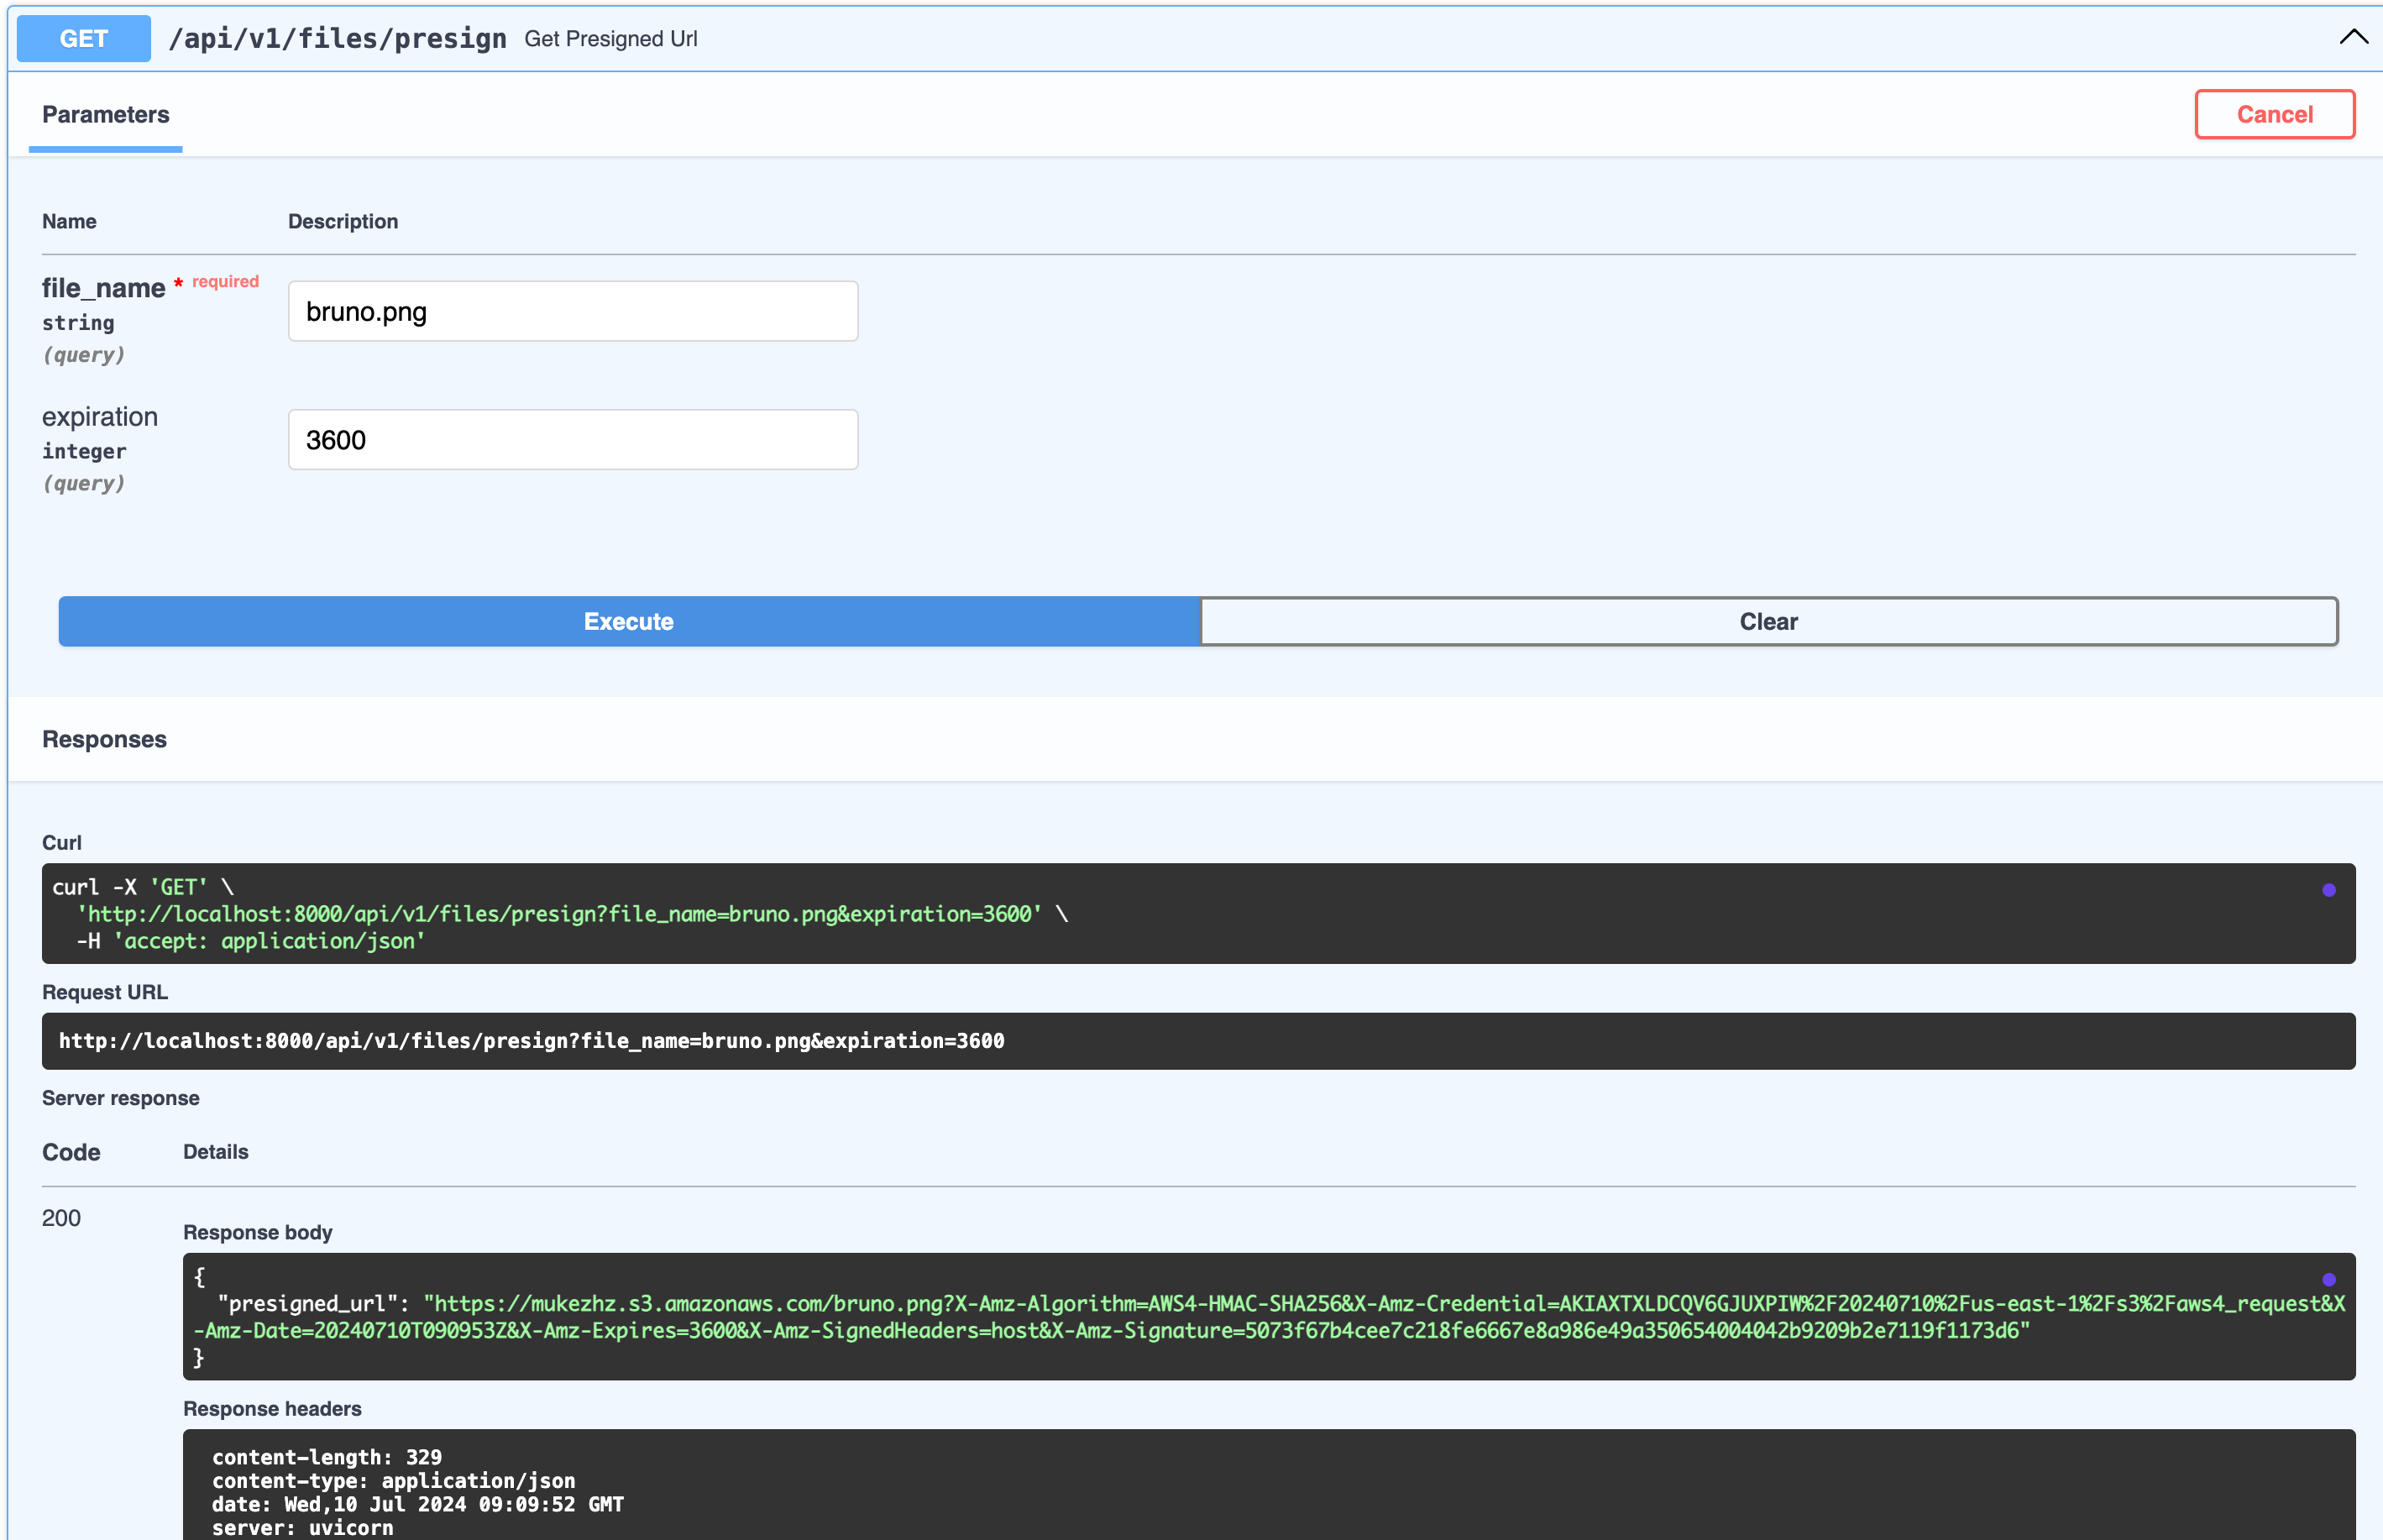
I will be using fastapi docs which will fill the value of bucket_name, object_name and expiration
| HTTP Method | Endpoint |
|---|---|
| GET | /api/v1/files/presign |
| POST | /api/v1/files/presign |
- file_name -> bucket_name
- bucket_name -> mukezhz
- expiration -> 3600
Let’s upload the file
-
Create a bucket with default configuration
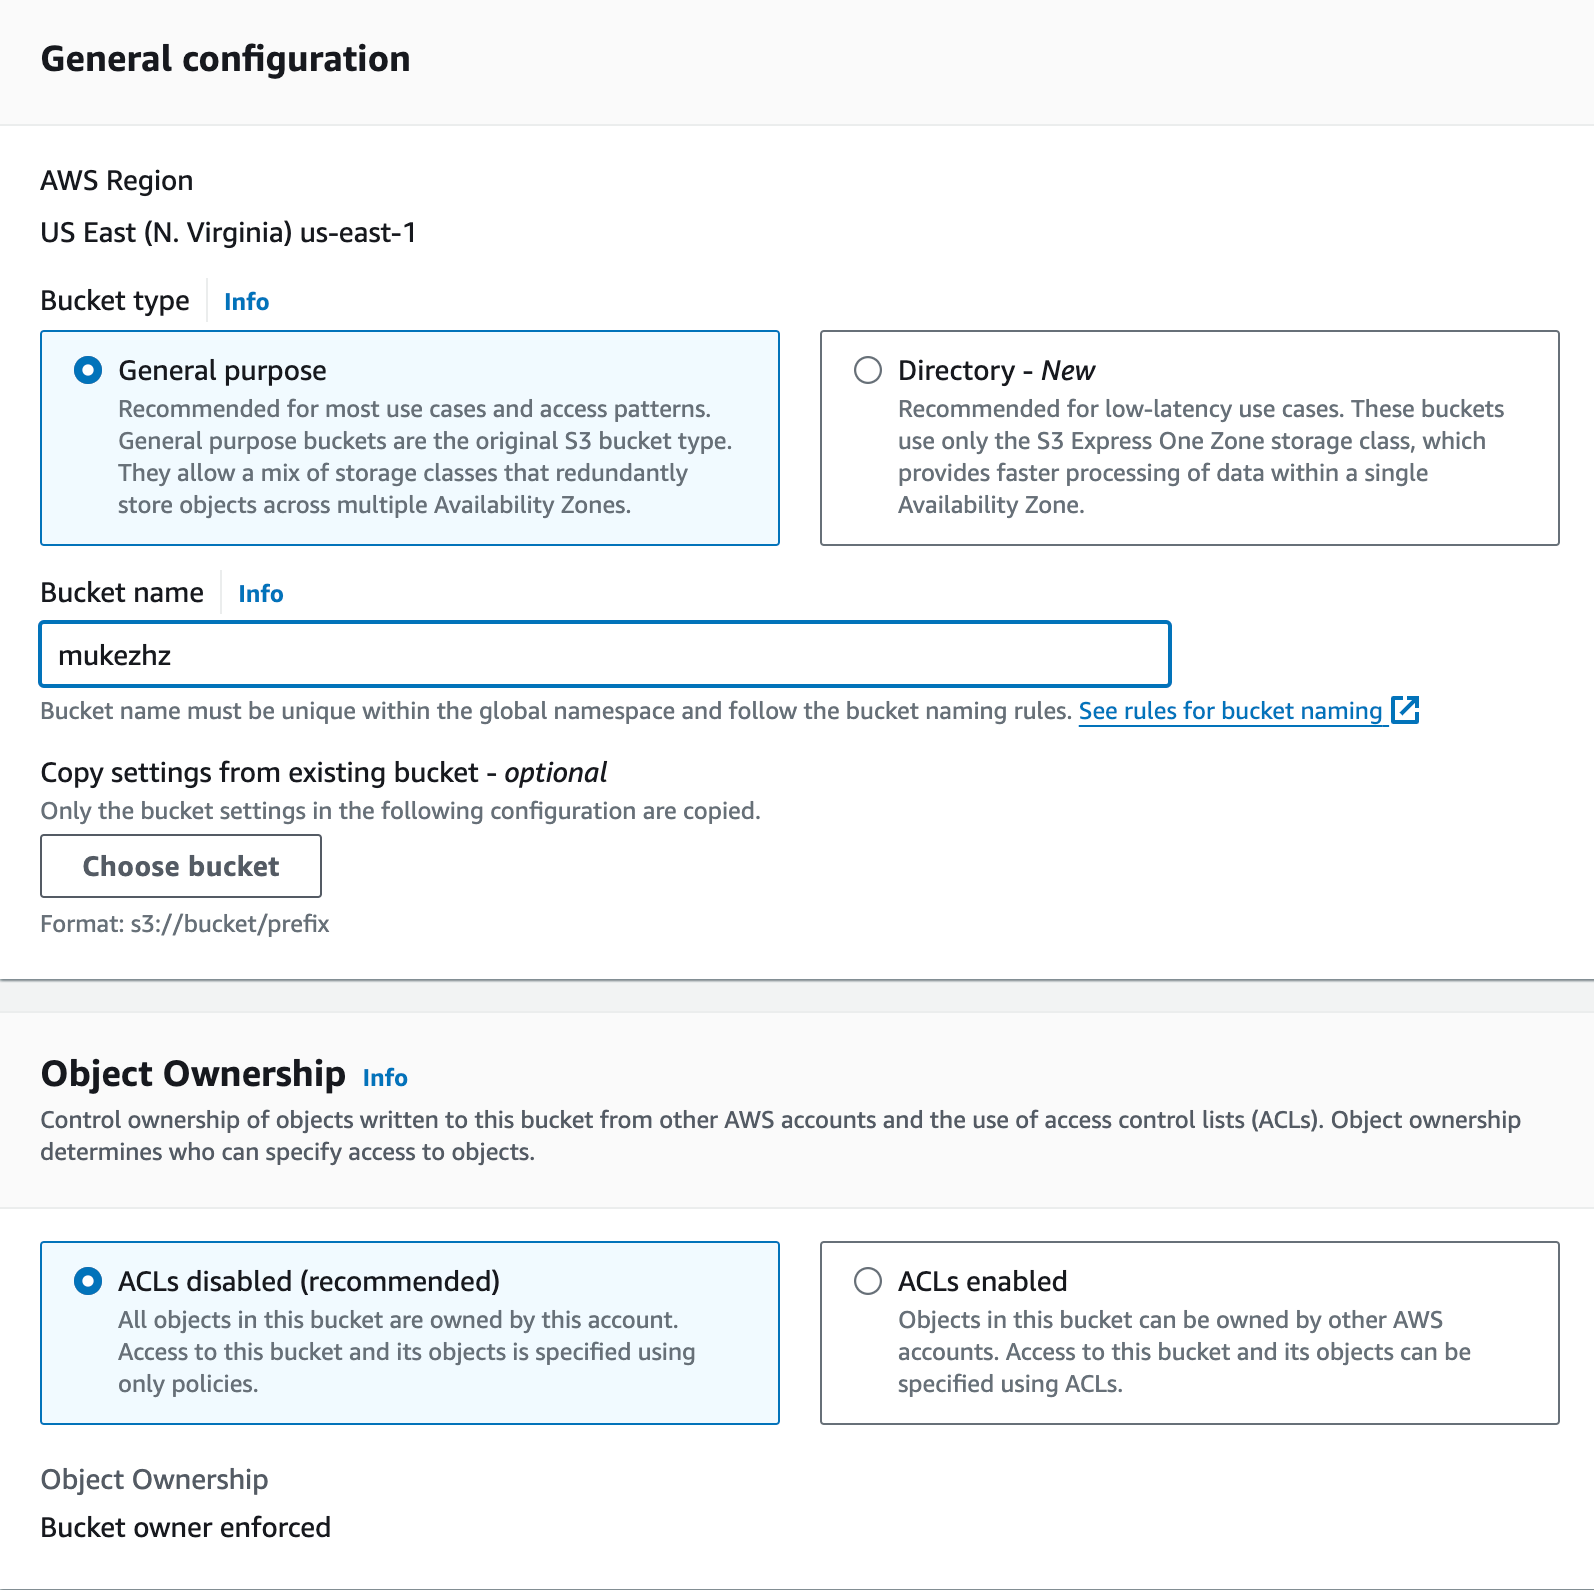 NOTE: Take great care in which region you have created your bucket
 -
Generate Presigned URL to upload bruno.png image
-
Once presigned URL is obtained use the api client like bruno, postman, insomnia… to upload your file
-
Uploading using bruno
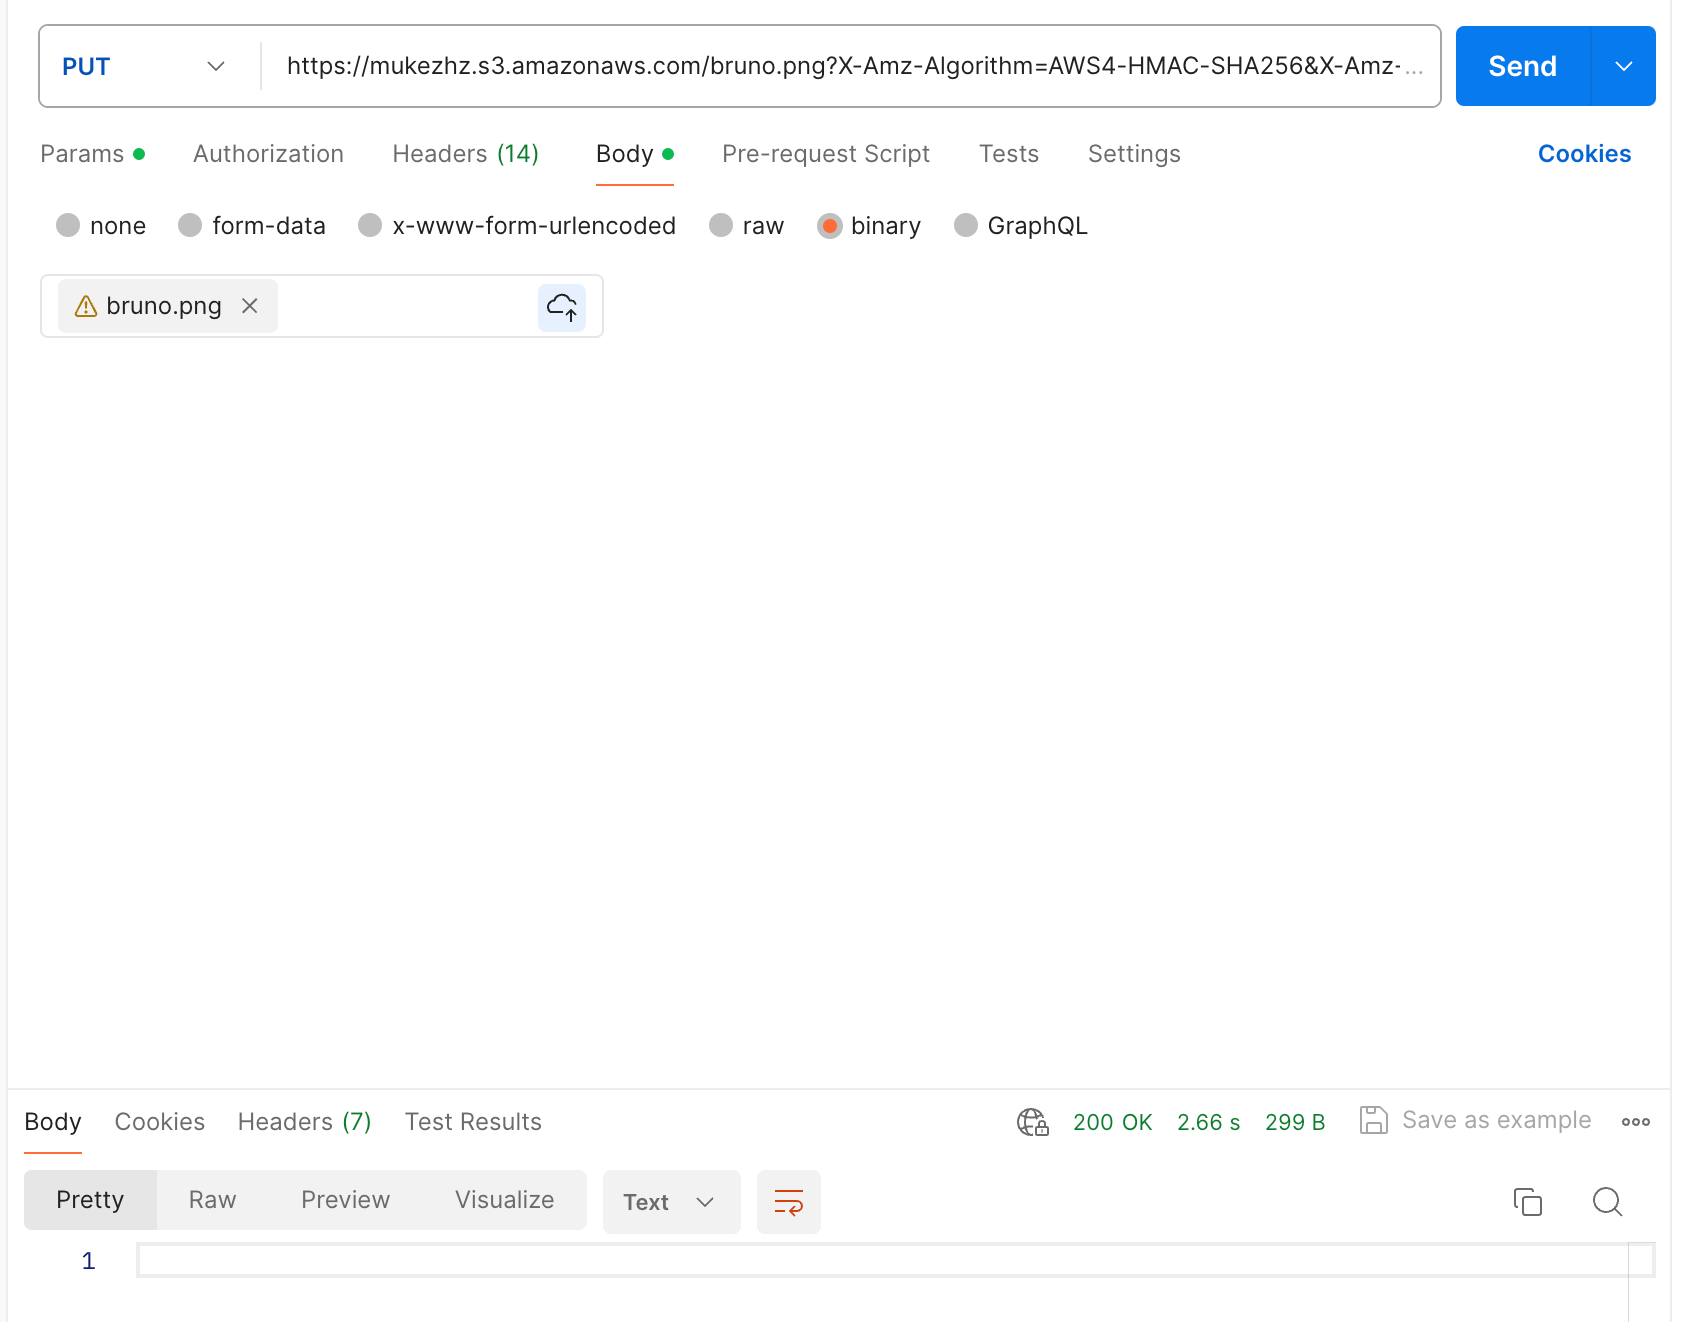
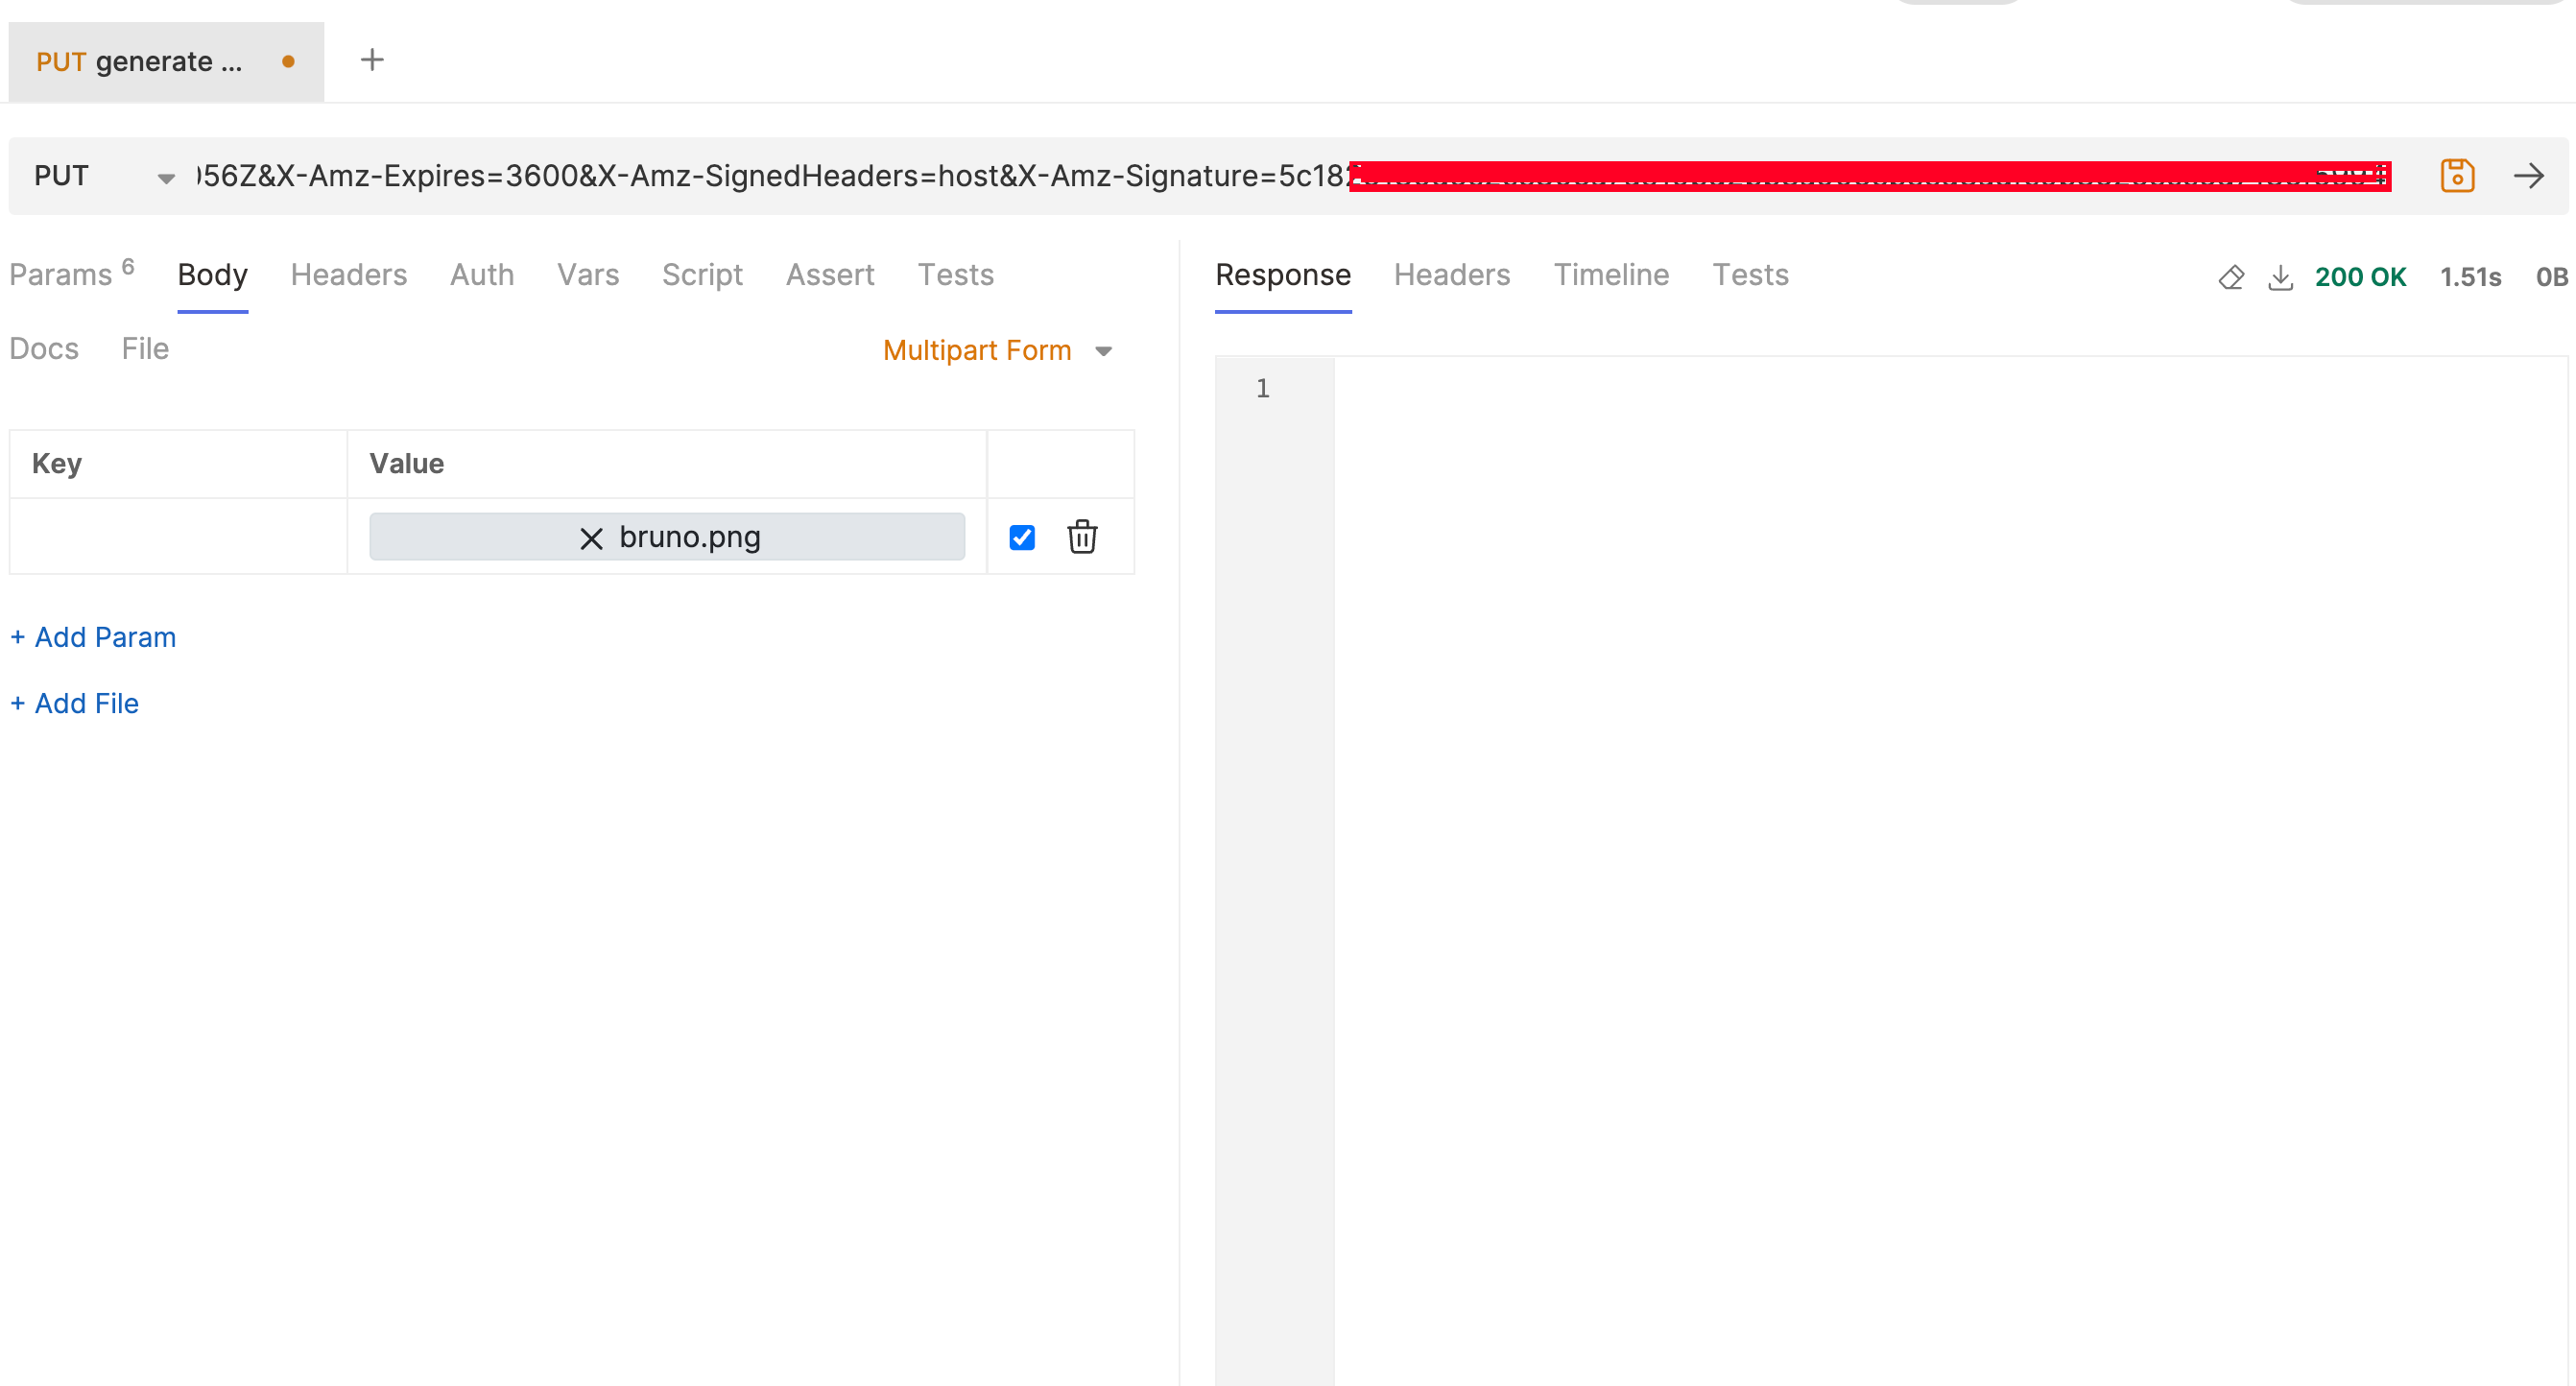 NOTE: HTTP METHOD: PUT and Multipart file is added (In case of postman Binary file)
 -
Uploading using postman
-
On Navigating to the s3 bucket. You can see the uploaded file

But what about uploading from Browser?
- You might get CORS issue.
- In order to allow browser to upload you need to allow CORS in s3 bucket
- Navigate to s3 bucket
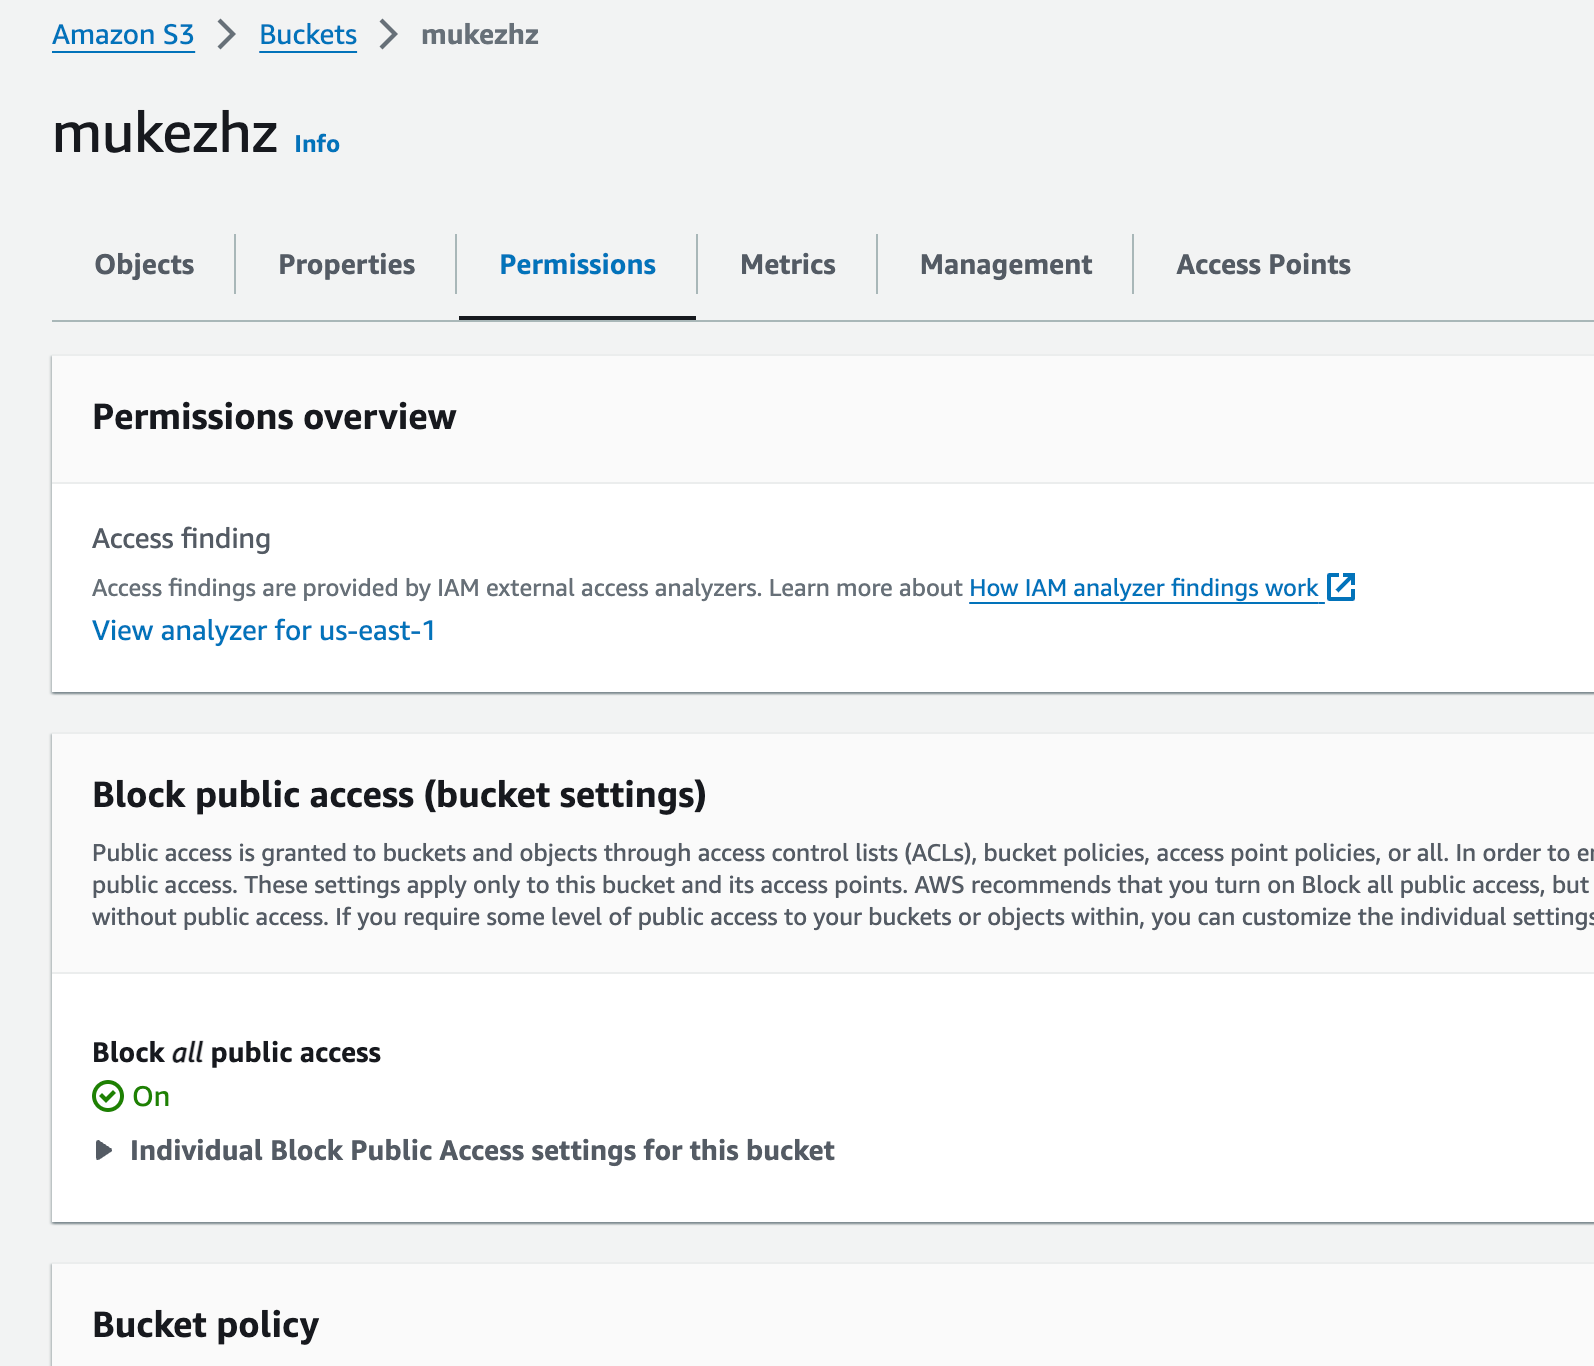
- Scroll below you will see Cross origin resource sharing(CORS) section
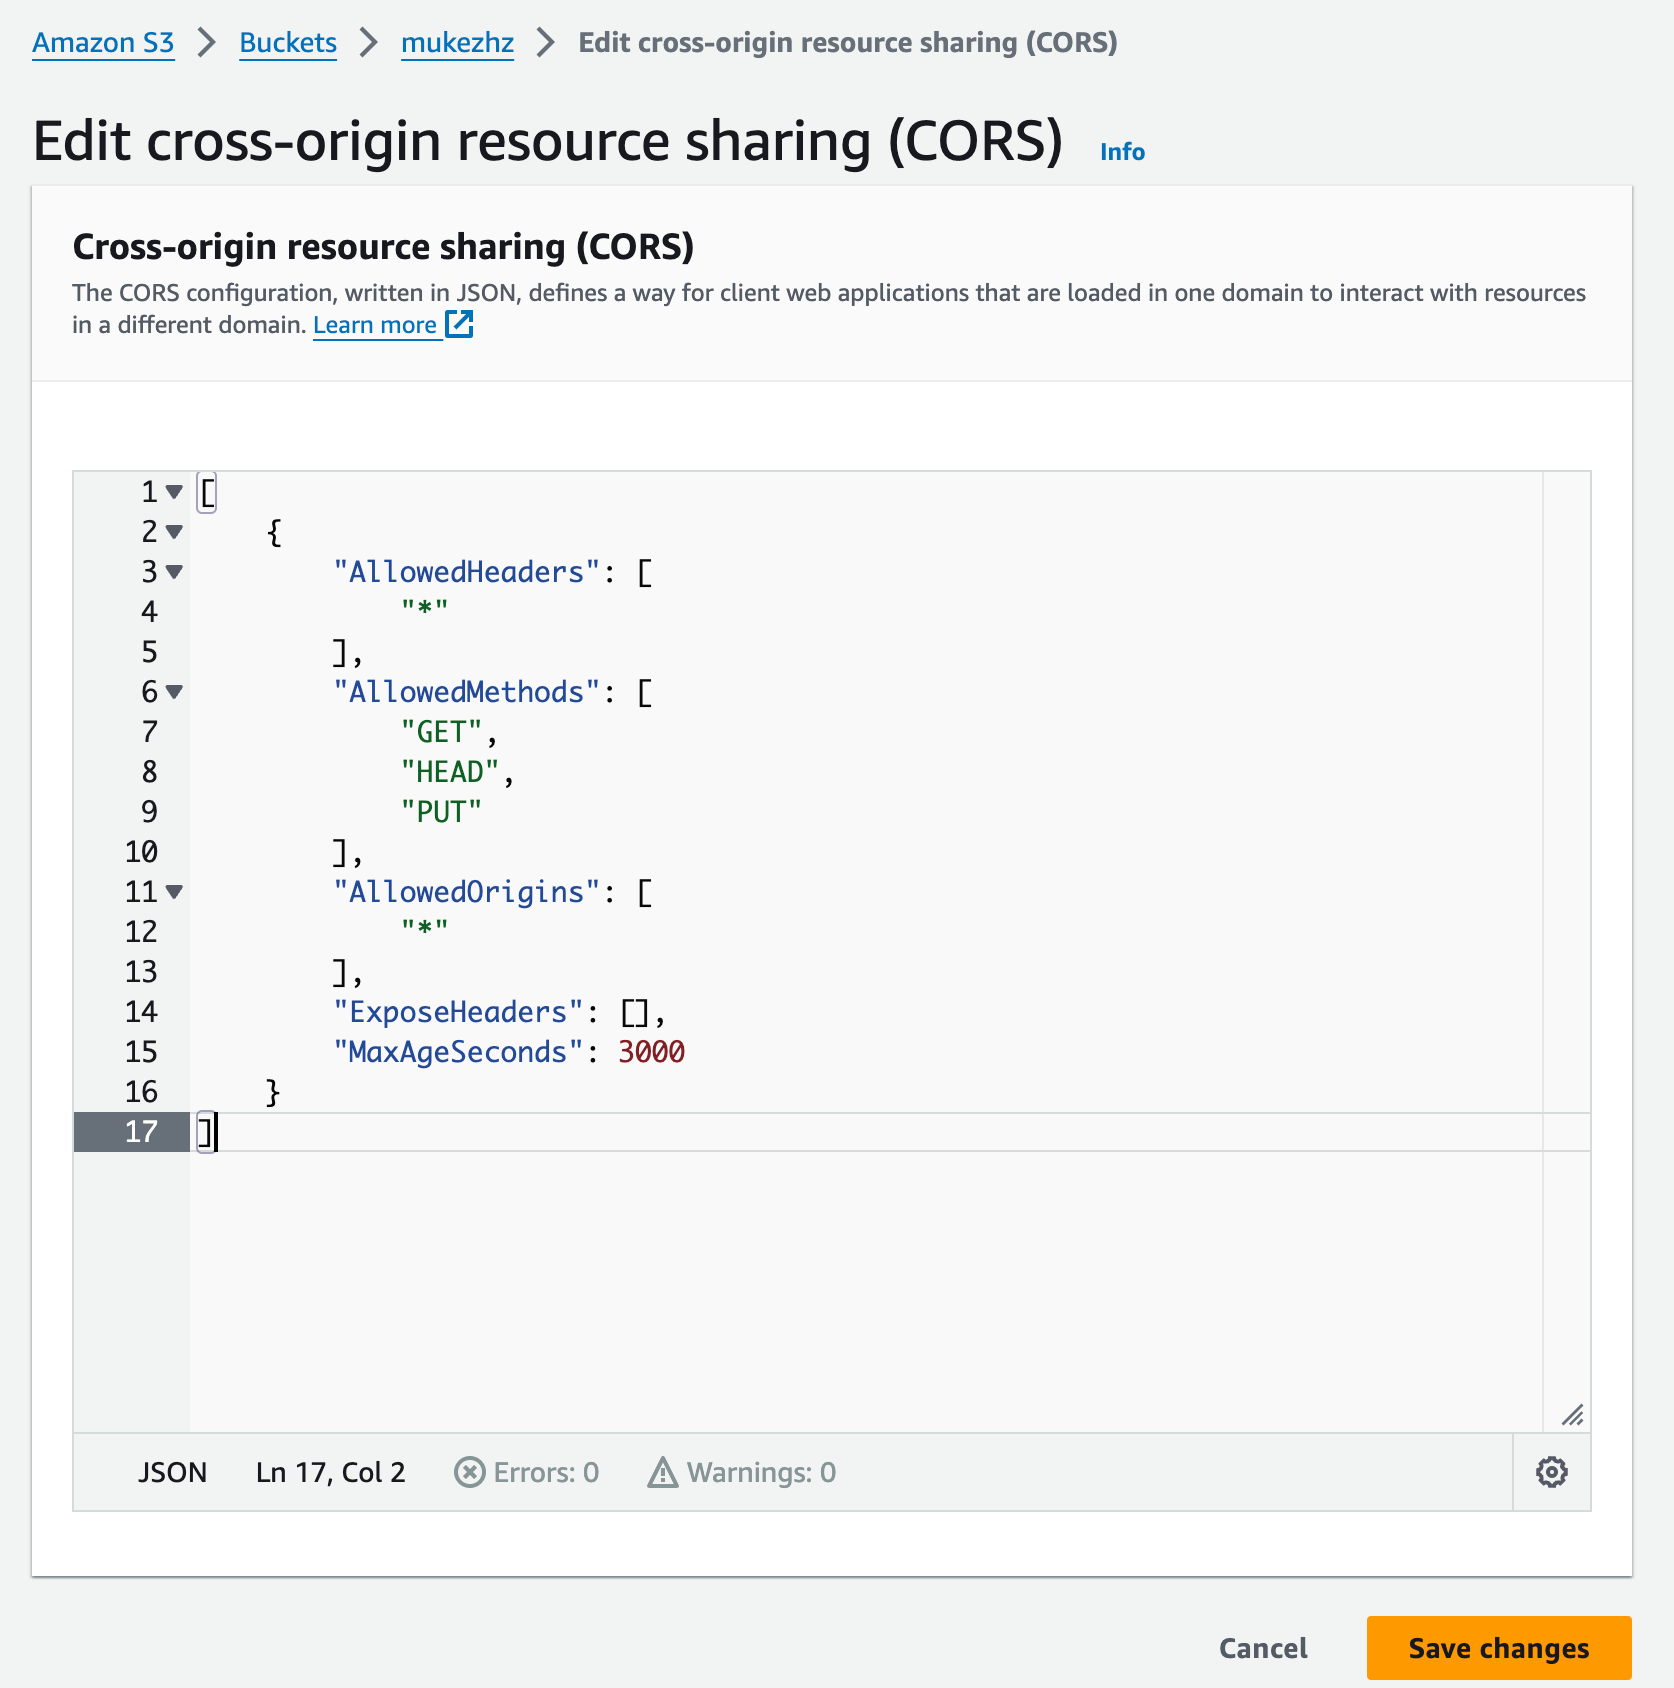
- Edit it and add the following content
[
    {
        "AllowedHeaders": [
            "*"
        ],
        "AllowedMethods": [
            "GET",
            "HEAD",
            "PUT"
        ],
        "AllowedOrigins": [
            "*"
        ],
        "ExposeHeaders": [],
        "MaxAgeSeconds": 3000
    }
]
NOTE: I have allowed all the origins you might allow certain domain only for security reasons
Code to upload file from browser
<html>
...
<body>
    <h2>Upload PNG File</h2>
    <form id="uploadForm">
      <input type="file" id="fileInput" accept=".png" />
      <button type="submit">Upload</button>
    </form>
    <p id="status"></p>
    <script>
      document
        .getElementById("uploadForm")
        .addEventListener("submit", function (event) {
          event.preventDefault();

          const fileInput = document.getElementById("fileInput");
          const status = document.getElementById("status");

          if (fileInput.files.length === 0) {
            status.textContent = "Please select a file.";
            return;
          }

          const file = fileInput.files[0];

          if (file.type !== "image/png") {
            status.textContent = "Please upload a PNG file.";
            return;
          }

          // Replace this with your actual pre-signed URL
          const presignedUrl = "PRESIGNED_URL";

          const formData = new FormData();
          formData.append("file", file);

          fetch(presignedUrl, {
            method: "PUT",
            body: file,
            headers: {
              "Content-Type": "image/png",
            },
          })
            .then((response) => {
              if (response.ok) {
                status.textContent = "File uploaded successfully!";
              } else {
                status.textContent = "File upload failed.";
              }
            })
            .catch((error) => {
              status.textContent = "An error occurred during the upload.";
              console.error("Error:", error);
            });
        });
    </script>
  </body>
</html>
Let’s access the file
- Fill the file_name (ie. object_name)
NOTE:: object_name should match with file name in s3 bucket in my case bruno.png
- Now you can access your file using the generated URL
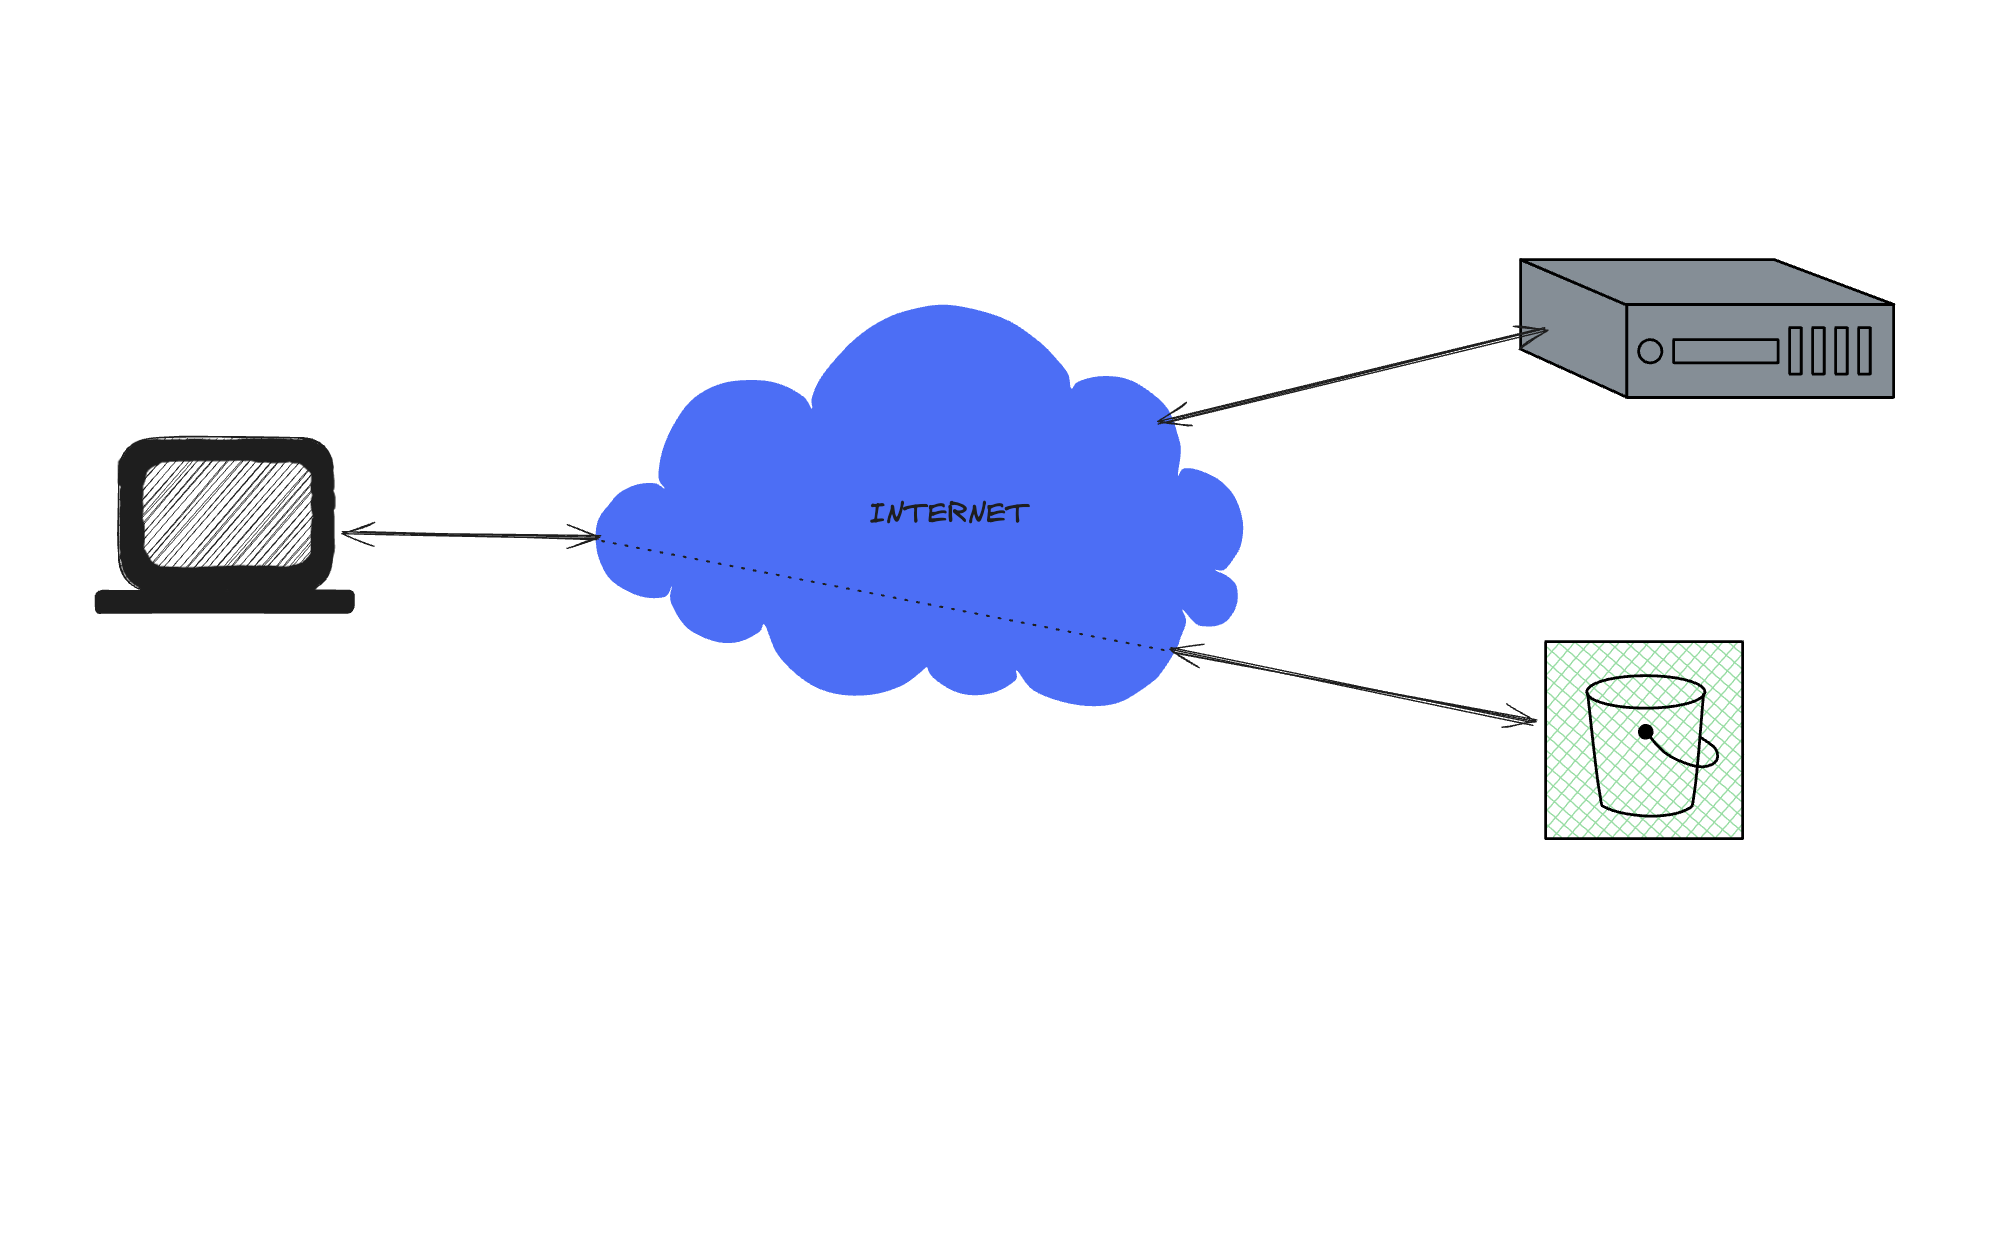
What if backend directly upload to s3 bucket?
The client will upload file to backend server and backend server will upload that file by generating presigned URL which we have discussed earlier.
- In this case there is over head upload to backend then again upload to s3 bucket.
- total time taken = uploading from client to backent + uploading from backend to s3
- Instead of uploading twice it is better to generate presigned URL and upload directly from client
Consequences of uploading file directly from client
- Once the user get the presigned URL user is able to upload the file unless the URL expires.
- If the bad actor has access to the presigned URL they can pollute the bucket by uploading many files.
- So depending upon situation you need to adjust the expiration time and only allow authorized user to upload the image
In case you want to learn how to upload a file to S3 using Node.js, please check out this article:
Viola 🎉
I hope you find this article interesting.
Thank you for reading!
Let me know if you need any further adjustments!